
The Mold Remediation Process: 5 Essential Steps to a Healthier Home

The most effective way to clear your home of toxic mold often doesn't involve tearing down your walls or living in a construction zone for weeks. Since mold can begin to grow on damp materials within just 24 to 48 hours, the pressure to act quickly often leads to anxiety about the mess and expense of remediation. You might be navigating a sea of conflicting advice about whether to scrub surfaces, spray chemicals, or gut the entire room. Understanding the professional mold remediation process steps is the first step toward regaining control and ensuring your indoor air quality is truly safe.
You deserve a solution that prioritizes your health without the unnecessary mess of traditional demolition. This guide provides a clinical, step-by-step roadmap to professional mold removal. It highlights how modern innovations like dry fog technology eliminate microscopic spores at the source without invasive teardowns. We will walk through the five essential phases of restoration, from the initial inspection to the final, lab-verified clearance testing. You'll also discover practical strategies to prevent recurrence in the San Francisco climate, ensuring your home remains a sanctuary for long-term health.
Key Takeaways
- Learn why professional assessments use thermal imaging and moisture meters to find hidden mold colonies that a simple visual check might miss.
- Understand the clinical mold remediation process steps, including how containment strategies like 6-mil polyethylene sheeting prevent spores from spreading to unaffected areas.
- Discover how modern dry fog technology and HEPA vacuuming eliminate mold spores without the need for invasive and costly demolition.
- Explore the importance of post-remediation verification testing to ensure your home meets strict air quality standards with lab-verified results.
- Gain practical insights into managing San Francisco's unique coastal humidity to prevent mold from returning to your attic or bathrooms.
Step 1: Professional Inspection and Clinical Assessment
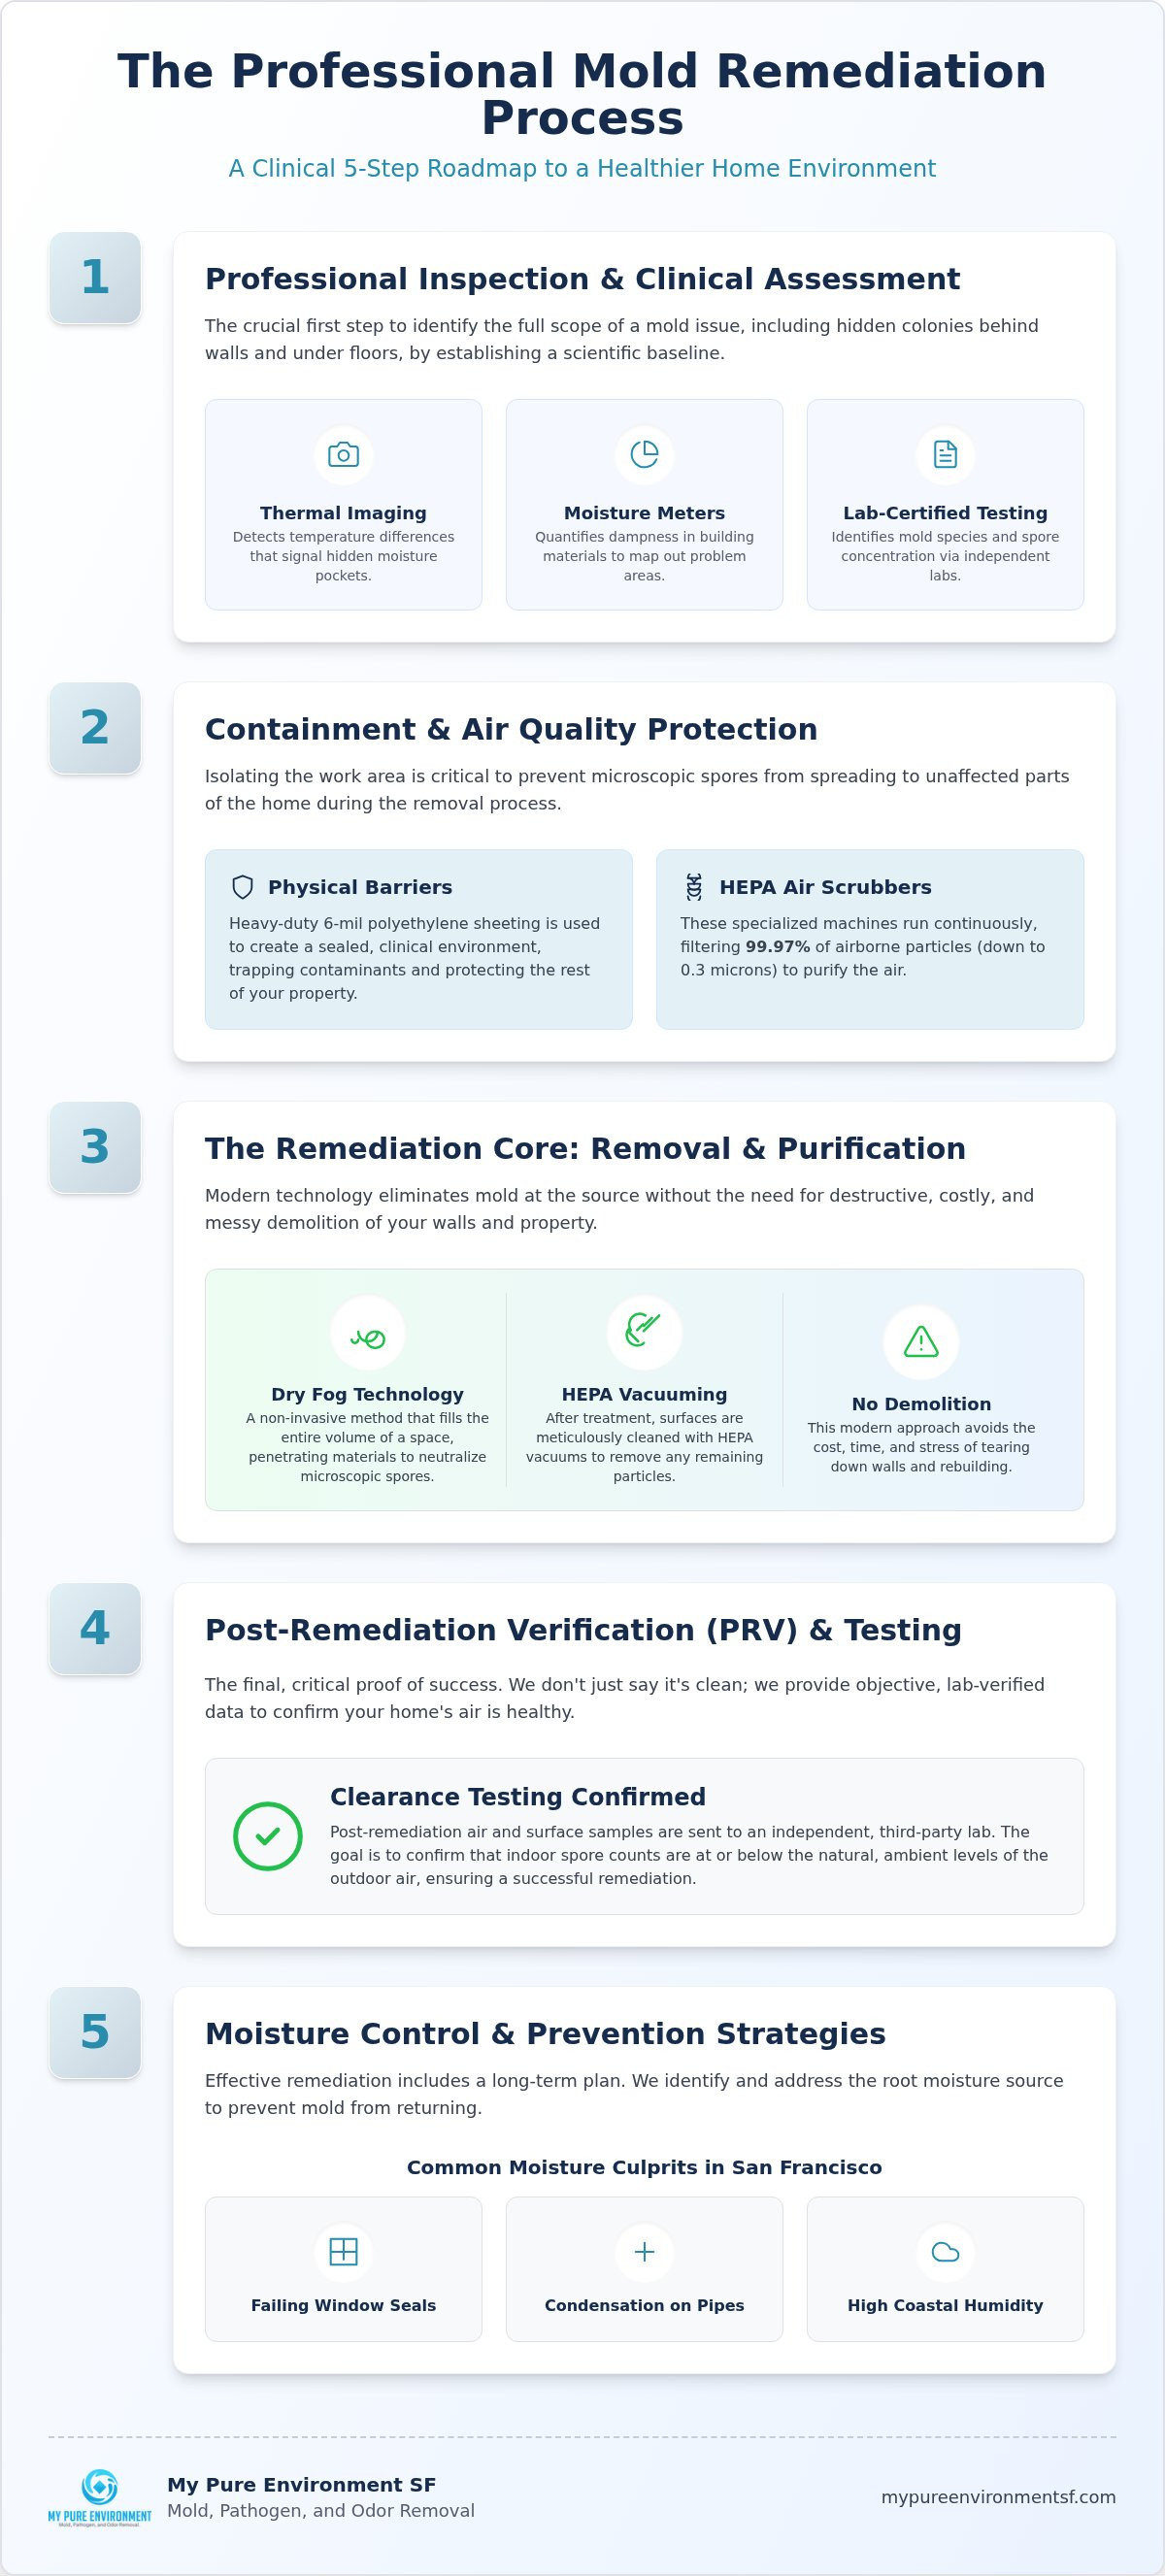
In the foggy microclimates of San Francisco, a visual check is rarely enough to understand the health of your home. Most mold issues remain hidden behind drywall or under floorboards, where moisture lingers undetected. The first phase of the mold remediation process steps involves a rigorous clinical assessment. Specialists use advanced diagnostic tools like thermal imaging cameras to detect temperature variances that signal hidden moisture. Moisture meters then quantify the dampness within building materials, providing a clear map of where mold is likely colonizing. This data allows us to establish a baseline for indoor air quality before any work begins, ensuring we have a scientific metric for success.
The Importance of Lab-Certified Testing
Testing isn't just about finding mold; it's about identifying the specific species and concentration levels. For a comprehensive indoor mold overview, it's helpful to understand that some species are more concerning than others in a residential setting. We collect air and surface samples that are analyzed by independent, third-party laboratories. These labs provide objective data on spore counts, comparing indoor levels to outdoor ambient air. While many homeowners try "DIY mold kits," these often provide misleading results. They typically show growth simply because mold spores exist in almost every environment, but they fail to provide the quantitative analysis needed to determine if a professional intervention is necessary.
Identifying the Underlying Moisture Source
Remediation is only a temporary fix if the underlying cause of dampness isn't resolved. In San Francisco, common culprits include failing window seals, condensation on cold pipes, or high humidity levels driven by coastal fog. If we don't address the water source first, the mold will inevitably return. Our specialists look for these systemic issues during the inspection phase to create a customized remediation plan. This plan accounts for your home's unique layout and the specific moisture challenges of your neighborhood. By focusing on the root cause, we ensure that the removal process leads to a permanent improvement in your home's environmental health.
Step 2: Containment and Air Quality Protection
Proper containment acts as the essential barrier between a localized mold issue and a whole-home environmental crisis. When technicians begin the physical removal of colonies, millions of microscopic spores are often released into the air. To manage this risk, the mold remediation process steps require the installation of physical barriers using heavy-duty 6-mil polyethylene sheeting. These barriers isolate the affected zones from the rest of the property, creating a clinical environment where contaminants are trapped and managed. It's a meticulous process that prevents a small bathroom leak from affecting your entire living room or kitchen.
Within these isolated zones, high-efficiency particulate air (HEPA) scrubbers operate continuously to maintain air purity. These specialized machines are engineered to filter 99.97% of airborne particles as small as 0.3 microns, which includes the vast majority of mold spores. Adhering to the EPA mold cleanup guide ensures that the air is actively purified throughout the remediation, preventing disturbed spores from settling on previously clean surfaces. This continuous filtration is vital for maintaining a safe environment for both the workers and the residents.
Preventing Cross-Contamination
Mold spores are opportunistic travelers that easily navigate through HVAC ductwork, doorways, or open hallways. To stop this movement, we establish multi-stage decontamination chambers at the entrance of the work zone. These transition areas allow technicians to clean their equipment and remove soiled outer gear without carrying particulates into the clean areas of your home. We also seal off all supply and return vents within the containment area to protect your central air system. For homeowners worried about the safety of their belongings, our indoor air quality improvement specialists ensure that unaffected furniture and personal items remain protected throughout the project.
Specialized PPE for Technician Safety
Safety protocols are paramount for both the residents and the specialists performing the work. Technicians utilize N-95 or P-100 respirators to ensure they don't inhale microscopic spores during the more active phases of removal. Full-body protective suits act as a final layer of defense, preventing spores from hitching a ride on fabric or skin. Negative air pressure is maintained as a critical safety standard to ensure that air only flows into the containment area, never out of it. This pressure differential ensures that even if a seal is briefly broken, the contaminated air remains trapped within the controlled environment.
Step 3: The Remediation Core - Removal and Air Purification
The core of the mold remediation process steps involves the physical removal of fungal colonies and the systemic purification of the indoor environment. Traditional methods often rely on aggressive demolition, tearing out drywall at the first sign of growth. While this is sometimes necessary for structural integrity, modern clinical approaches prioritize air quality and systemic neutralization. We begin with HEPA vacuuming of all surfaces within the containment zone to remove the bulk of mold colonies and settled spores. Following this, an antimicrobial treatment is applied to neutralize mold at the root. This step is crucial because it addresses the biological life cycle of the organism without relying on toxic fumes that could linger in your living space.
Dry Fog Technology: Remediation Without Demolition
The primary advantage of a specialized approach is the use of Dry Fog technology. This system creates micron-sized particles that behave like a gas, allowing them to penetrate porous materials and reach spores hidden deep within wall cavities or ceiling voids. For historic San Francisco homes, this non-invasive method is a game changer. It eliminates the need to gut beautiful lath-and-plaster walls or original woodwork. Because the fog is "dry" to the touch, it's safe for sensitive items like electronics, upholstery, and fine art, ensuring your home's contents are treated alongside the structure itself. This level of precision aligns with the CDC mold cleanup and remediation guidelines, which emphasize thoroughness in removing contaminants while protecting occupant health.
Cleaning Hard vs. Porous Surfaces
Not every item in a mold-affected room needs to be discarded. Hard surfaces like metal, glass, and most plastics can typically be saved through a clinical scrubbing process and HEPA vacuuming. However, porous materials such as insulation, carpet, and some drywall may need to be replaced if the mold has deeply infiltrated the fibers. For structural elements like lumber and framing, we use specialized scrubbing techniques to ensure the wood is clean and stable. This is particularly important for attic mold remediation and crawl space projects where structural beams are exposed. By carefully distinguishing between what can be restored and what must be removed, we minimize disruption to your daily life while ensuring a mold-free environment.
Step 4: Post-Remediation Verification (PRV) and Testing
The final phase of the mold remediation process steps is arguably the most critical for your peace of mind. While some contractors suggest the job is finished when the musty smell disappears, true restoration requires scientific confirmation. Post-Remediation Verification (PRV) is the clinical standard used to prove that the environment is safe for re-occupancy. This process begins with a meticulous visual inspection to ensure all dust, debris, and residual moisture have been eliminated. Even a small amount of leftover dampness can reignite fungal growth, so we use moisture meters to verify that building materials have reached a dry standard. We don't rely on guesswork; we rely on data.
Our verification process adheres to the IICRC S520 Standard for Professional Mold Remediation, which has been recognized in federal legislation for its rigor. This documentation is a core part of the mold remediation process steps that protects your property value and your family's health. By following these industry-developed, consensus-based standards, we ensure that the cleanup meets the highest levels of safety and professional accountability.
What a PRV Report Includes
A comprehensive PRV report provides a documented paper trail of your home’s recovery. It includes a direct comparison between the post-cleanup air samples and the outdoor baseline levels established during the initial inspection. This data verifies that the indoor spore counts are now within a safe, natural range. For homeowners, this document is more than just a summary; it's a vital asset for insurance claims or future real estate transactions. It serves as a formal Certificate of Completion, proving to third parties that the mold issue was handled through professional, clinical protocols rather than just a cosmetic cleanup.
Ensuring Long-Term Air Purity
Achieving "clinically safe" air is a higher standard than simply being "mold-free." Since mold spores exist naturally in almost every environment, the goal is to return your home to a state where the indoor air quality is equal to or better than the air outside. To ensure this purity remains stable, we often recommend a secondary round of Mold Testing & Inspection roughly 30 days after the project concludes. This follow-up provides ultimate peace of mind, confirming that the moisture source has stayed dry and no dormant spores have found a new place to colonize. It's the final step in transitioning from a state of crisis to a state of long-term wellness.
If you want to ensure your home meets these rigorous safety standards, it's time to schedule a professional air quality assessment today.
Step 5: Moisture Control and Prevention Strategies
Completing the physical mold remediation process steps is only half the battle. In a coastal environment like San Francisco, the work isn't finished until you've established a robust defense against the city's persistent humidity. Our microclimates create unique challenges, particularly during the "Fog Season" when outdoor moisture levels frequently spike. Without a proactive strategy to manage indoor air quality, even the most thorough cleanup can be undermined by new growth. We focus on systemic health, ensuring your home remains a sanctuary rather than a breeding ground for spores.
Regular maintenance of aging infrastructure is non-negotiable for local property owners. San Francisco's historic housing stock often features aging plumbing and roof systems that are prone to slow, silent leaks. We encourage homeowners to perform quarterly checks on window seals and attic insulation, as these are the first lines of defense against water intrusion. If you notice a spike in humidity or a lingering musty scent, it's a sign that your ventilation systems may be failing to keep up with the external environment. Addressing these small issues early prevents the need for a repeat of the entire remediation cycle.
SF-Specific Prevention Tips
The layout of traditional San Francisco Victorians often limits natural cross-ventilation. To combat this, we suggest keeping interior doors open to encourage airflow and using high-quality dehumidifiers in lower levels. Basements and crawl spaces in the Bay Area are particularly susceptible to mold because they sit in cooler, damper soil that pulls moisture through foundation walls. Maintaining a target humidity range of 30% to 50% is essential for these subterranean areas. Improving the seal on your crawl space and ensuring your attic vents are clear of debris will significantly reduce the biological load on your home's air filtration system.
Professional Long-Term Solutions
For homeowners seeking an extra layer of protection, we offer professional antimicrobial shields. These specialized coatings are applied to surfaces after the mold remediation process steps are complete, creating a microscopic barrier that prevents future spores from taking root. We also recommend the installation of smart moisture sensors in high-risk areas like under sinks or in attics. These devices act as early warning systems, alerting you to leaks before they evolve into a full-scale mold colony. If you are concerned about the current health of your living space, you can Schedule your clinical mold inspection today to receive a comprehensive, data-driven assessment of your home's air quality.
Restoring Your Home's Environmental Health
Navigating a mold concern doesn't have to mean enduring weeks of messy demolition or living with the anxiety of hidden toxins. By following the standardized mold remediation process steps, you transition from a state of uncertainty to a home that is clinically verified for safety. The combination of lab-certified testing and non-invasive dry fog technology ensures that your property is treated thoroughly without the disruption of traditional construction. This methodical approach prioritizes your long-term wellness by addressing the root cause of moisture and verifying results through objective science.
Your peace of mind is the ultimate goal of any restoration project. Armed with expert San Francisco local knowledge and a commitment to air quality, you can protect your family from the unique environmental challenges of the Bay Area. If you're ready to take the first step toward a healthier living environment, we are here to act as your meticulous specialist and protective guide.
Get a Professional Mold Assessment in San Francisco and regain confidence in the air you breathe. You have the power to create a lasting, mold-free sanctuary for yourself and your loved ones.
Frequently Asked Questions
How long does the professional mold remediation process typically take?
Most professional projects are completed within one to three days. The exact duration depends on the extent of the contamination and the specific layout of your property. While traditional demolition can drag on for a week or more, modern dry fog technology significantly accelerates the timeline. This efficiency allows you to return to a healthy environment much faster than older, more invasive methods.
Can I stay in my home while the mold remediation is being performed?
You can often remain in your home if the mold is localized to a specific area like a bathroom or attic. However, we typically recommend vacating the premises for a few hours during the actual dry fogging phase to ensure total safety and efficacy. Our team uses strict containment protocols to isolate the work zone, protecting the air quality in the rest of your living space throughout the process.
Does mold remediation always require tearing out my drywall?
Tearing out drywall is no longer the default requirement for every project. While structural integrity must be maintained, our non-invasive dry fog technology can often neutralize spores within wall cavities without demolition. This approach preserves your home's original materials and reduces the total cost and mess. We only recommend removal if the material is physically compromised or the mold has deeply infiltrated porous fibers beyond recovery.
Will my homeowners insurance cover the cost of mold remediation steps?
Insurance coverage typically depends on the underlying cause of the moisture. Most policies cover mold that results from a sudden or accidental peril, such as a burst pipe. However, mold caused by gradual leaks or lack of maintenance is often excluded. We recommend reviewing your specific policy and consulting with your provider to determine which mold remediation process steps are eligible for reimbursement under your current plan.
What is the difference between professional remediation and just using bleach?
Bleach is often ineffective on porous surfaces like wood or drywall because it cannot reach the mold's root system. It primarily changes the color of the mold while leaving the underlying colony alive. Professional remediation involves a systemic approach that physically removes the spores and neutralizes the environment. This clinical method ensures that the mold doesn't simply reappear once the surface moisture returns, providing a permanent solution for your home.
How do I know if the mold remediation was actually successful?
Success is confirmed through post-remediation verification testing. This involves taking air and surface samples after the cleanup is finished and sending them to an independent laboratory. The results must show that indoor spore counts have returned to a safe, natural level compared to the outdoor baseline. We provide you with a formal report and a Certificate of Completion, ensuring the mold remediation process steps were effectively executed.
Are the chemicals used in the dry fog process safe for my pets?
The sterilants used in the dry fog process are designed to be safe for your family and pets once the treatment has settled. We require pets and residents to be out of the home during the application for a few hours. Once the fog has dissipated and the surfaces are dry, it leaves no toxic residue behind. This makes it a much safer alternative to traditional, harsh chemical treatments that can linger for days.
What should I do immediately after discovering mold in my San Francisco home?
Your first priority should be identifying and stopping the source of moisture. Avoid disturbing the mold colony, as this can release millions of spores into your air. In the San Francisco climate, it's important to use a dehumidifier to keep the area as dry as possible until a specialist arrives. Scheduling a professional inspection is the most reliable way to assess the risk and prevent the issue from spreading further.
